| AT THIS TIME, PLEASE PUT ON YOUR SAFETY GLASSES AND WEAR
THEM FOR THE REMAINDER OF THE INSTALLATION
If the floor is concrete or below grade, lay out the foam
with moisture barrier, overlap the edges 4 inches and and use
duct tape to seal the seams. For other floors, lay the foam
underlayment the same direction the planks will be laid and butt
the edges. Do not over lap. Tape as needed to hold. Inspect the
planks for any defects, chips or other damage before installing.
The installer is the final authority of the flooring. |
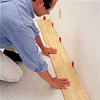 DO NOT INSTALL ANY MATERIAL THAT MAY HAVE BEEN DAMAGED. THE
MANUFACTURER'S WARRANTY MAY NOT APPLY.
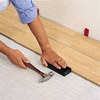 Leave a minimum of 1/4" space between the flooring and the wall and do a
trial (dry or no glue) layout of the first two rows of planks. The
planks should be installed so that a tongue faces out and to the right
of the installer. At the end of the first row, cut the plank as
necessary to fit. Insert blue spacers approximately 8 inches apart to
maintain the expansion space between the flooring and the wall. Be alert
to walls that are not straight and use spacers as needed to keep the
flooring straight.
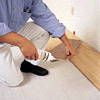 Use the remainder of the plank from the first row to start the second
row. If the piece is less than 8 inches long, cut a new plank in half
and use that piece to start the second row. Lay the rest of the planks
in the second row and ensure that the rows are straight and that no
gaping exists either on the side or butt joints. Once you have completed
the dry fit, remove all of the planks in order. You are now ready to
start the actual installation process.
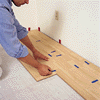 Place the first plank in the first row in the left hand corner of the
starting area with a tongue facing you and the other to your right.
Then, take the first plank or partial plank and use to start the second
row. Apply the glue to the upper surface of the groove as shown in the
figure below.
Please note: It is very important to follow the proper gluing
instructions. Too little or misapplied glue can result in joint failure
and too much can make the installation difficult. Apply a minimum of
1/16" to 1/8" bead of glue in a smooth, continuous motion. Use a dry
cloth to remove excess glue.
Gently push or tap the plank into place with the tapping block and
hammer. It should not be necessary to "pound" the planks together.
Should it be difficult to get the boards together, check the groove for
debris. Carefully apply pressure to the plank and ensure that no gaps
exist and that the installation is square.
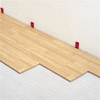 For DIY installations, use 2 - 3 inch pieces of blue tape to secure the
joints. Minimize foot traffic on the floor for a least 8 hours and avoid
working on the newly installed floor. For a more professional
installation, use the ProPac Floor Systems Clamps to secure the two
planks.
Note: The saw dust created contains aluminum oxide which can
scratch the floor. Therefore, cut the planks in an area removed from the
installation site if at all possible.
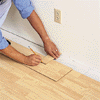 Continue the installation, using the ProPac Clamps on each board (or the
blue tape for DIY installations), working from left to right, row after
row. Remember to keep the joints or plank end pieces at least 8 inches
apart for a pleasing look. The last row may have to be cut to fit into
the space and still allow for the 1⁄4" expansion space.
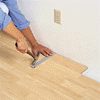 Place the planks to be cut on top of the planks in the next to last row.
Very carefully align the edges. Take a scrap piece of plank (with tongue
and groove) and trace the contour of the wall onto the plank to be cut.
Then saw the plank accordingly.
Fit the cut planks into place using the pull bar. Then add the spacers
to hold the joint firmly in place and apply the tape. Remove the tape
whenthe glue is set in approximately 1 hour.
Transitions and other installation accessories are available at most
local dealers. These include trim track (universal metal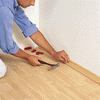 track for
installation of square nose, t-molding, step nosing, etc), wall to floor
transitions, and stair and landing treatments. When installing a
transition, ensure that the transition does not restrict expansion of
the floor. Do not nail an in-floor transition directly to the sub floor
- this will result in a "pinched" installation. To install an in-floor
transition, glue or nail the trim track to the sub floor and then snap
the transition into the track. track for
installation of square nose, t-molding, step nosing, etc), wall to floor
transitions, and stair and landing treatments. When installing a
transition, ensure that the transition does not restrict expansion of
the floor. Do not nail an in-floor transition directly to the sub floor
- this will result in a "pinched" installation. To install an in-floor
transition, glue or nail the trim track to the sub floor and then snap
the transition into the track.
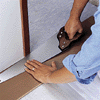 For a clean, finished appearance, the door jam should be undercut to
allow the flooring to be installed under it. To undercut the door jam,
lay a piece of scrap flooring on the underlayment and using that as a
guide, saw off the bottom the door jam so the plank will fit.
Vacuum the entire floor and then clean it using a laminate floor
cleaner. Should any glue residue remain, it may be necessary to remove
it with acetone. Never use any abrasives on your laminate floor and
avoid the use of other cleaners as they may contain substances harmful
to the surface, leave residues, or water spots. For stubborn stains use
acetone. Do not use steel wool, scratch pads, or other tools that may
scratch, dull, or polish the surface.
Clean the entire floor. If necessary, use a dry towel to buff dry.
This process will remove any film left from the glue. For dried glue,
use flooring cleaner. For stubborn glue, use acetone on a clean cloth.
Never use any abrasives on your laminate floor. Always apply cleaning
solution to the cloth or mop, and not directly to the floor.
Additional Information
To fit around pipes, measure and drill holes at least 1/2" larger
than the diameter of the pipe to allow for movement. Saw at a 45 degree
angle to the holes in the tile.
Always protect the floor by using felt protectors for chairs and
other heavy furniture. When moving furniture, lift and move before
setting on the floor.
| Every laminate flooring manufacturer has their own
installation procedures. We strongly recommend you read,
and follow, the manufacturer's installation procedures
for the flooring you purchase. You may notice how
similar they are, yet there are subtle differences in
certain aspects such as gluing. It is important to
realize that failure to follow the instructions supplied
by your manufacturer, or failure to use their
recommended products may void their warranty.
Although each manufacturer has their own guidelines,
here are a few things common among all. First, you need
a level, no bounce sub floor to lay the planks over.
Typically the floor should be sound and flat with no
voids greater than 3 inches. High spots must be ground
off and low spots filled to make the floor flat (1/8" in
a 48" length). You must account for a 1/4" gap along the
whole perimeter of the installation. If the floor is
touching or too close to a wall, it will undoubtedly
fail. |
All the laminate floors must be allowed to acclimate to their
final surroundings. Two or three days is usually appropriate. Do
not bring a floor home and install it. Allow the flooring to
adjust to its new environmental conditions before you start the
installation.
In our forums, many people have placed comments about
laminates. In order to avoid seeing the seams near a patio door
please consider running the planks at a right angle to the door,
or at a 45 degree diagonal angle - which is more work, but quite
attractive. |
|


